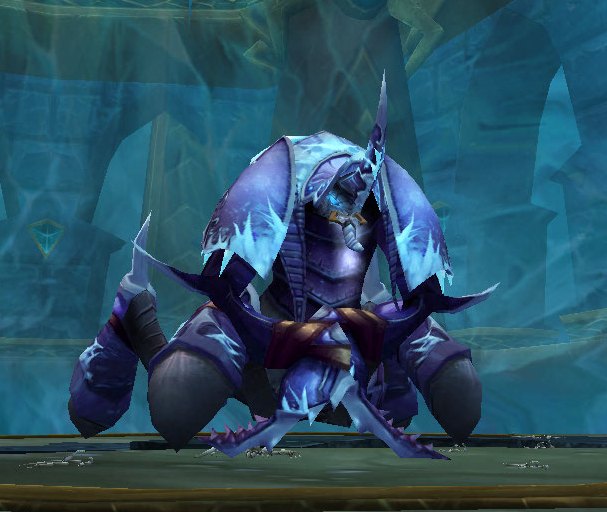
Anub’arak is kind of a big deal…
Or so he thinks. But in all seriousness, In the Trial of the Grand Crusade, the difference in difficulty between Anub and the rest of the instance is substantial. The level of play that is required to down this boss is quite a step up from any of his previous loot pinatas. This encounter is all about execution, gear, and the race to kill him. There are a few rather large differences between the normal and hard mode versions of this little blue bug. First and foremost is the time you have to kill him. For multiple reasons, you only have two surface phases to get him to 30%. If you fail to do so, you will wipe. You also only have 6 permafrost’s to use during the duration of the fight, meaning that they should be spread out appropriately and they should be used wisely. Let’s get to the phases…

Phase 1 positioning and tactics
In phase one, I began by popping an Ironshield potion, wings and DP and then running in and turning him on a dime. We tanked him where he spawns until the first permafrost is dropped near him. At that point you should drag him to the permafrost and get his hit box on it. This is not to prevent him from burrowing, but to take advantage of melee splash damage. As your team of dps’ers focuses down the adds, they will be doing damage to Anub’arak as well. From the Main tank’s perspective, once you have positioned him with in splash damage range, this phase is a tank and spank. The off tanks job is to pick up the two adds and drag them to the permafrost. A freedom on your offtank makes positioning much easier as well, so lend your fellow tank a “hand.” Another very important change from Normal to Heroic Mode is that the adds have a cast that gives them a shadowstep ability. This cast is interruptible and must be stopped or the adds will one shot your clothies. Assign two melee dps to each be responsible for interrupting one of the two adds. Raid Icons help dramatically on this aspect of the fight.
While the first set of adds is on the permafrost and being killed, this is the time when one of your ranged dps should be strategically dropping all of the permafrost to the ground. You want them spread out all around the room as much as possible. We DPS down the first pair of adds and then switch all dps to the boss. When the second set of adds spawns, the off tank picks them up and pulls them to the permafrost, but the dps should stay on the boss. At the end of the first phase, you should have Anub’arak to about 55%. If you don’t, you are behind the dps marker that is required to defeat this fight. Once Anub’arak burrows, you want to finish off the two adds as soon as possible and prepare for the phase 2 positions.
Phase 2 is all about coordinated movement
During phase two, there are a few things that are going on all at once, and they are all very important to master. First and foremost, you should be kiting the spikes to a distant permafrost, but in hard mode, the spikes continually speed up so dont try to be a hero and kite them across the room unless you are a class that has a blink like ability. The key to the kiting is to spend the full duration of the burrowing phase kiting the spikes from permafrost to permafrost. There should be 6 permafrost’s down, and you can only use 5 during this phase, as you need the 6th to tank the adds on during the surface phase.
The second thing that is going on during the burrowing phase is that a ton of beetles surface and they have to be killed. These bad boys put a stacking debuf on their target that does periodic damage. This debuf can stack infinitely, and deals significant damage over time. These bugs should be dpsed down by ranged only if it is possible, as the debuf lasts for a minute and is quite nasty.
After your burrowing phase ends, all of the little adds should be dead, and Anub’arak will resurface. It is imperative that you drag him back to the permafrost that is left and tank him with his hit box overlapping again, so that you can take advantage of the splash damage.
Rinse and Repeat?
So when Anub’arak resurfaces you have 80 seconds to get him to 30% or its a guaranteed wipe. You should use the same strategy that you did on the P1 above, burn the first set of adds, tank them on the permafrost, take advantage of splash damage, and blow up the boss till 30%. At 30% you have to really get those adds down quick, because another twist that blizzard has added for hard mode is that the adds keep spawning. You will periodically have to switch to the adds and dps them down. Now that you have hit 30% though, you have leeching swarm ticking away at you. We originally only had an spriest to provide a 20% healing reduction debuff and found that it was not enough to counter the amount of healing anub receives from raid heals. Once you are at this point in the fight, its a race against the healers mana. You have to kill anub before your healers go oom or you hit the enrage timer (which ever comes first). Other than that, there is really nothing special about phase 3.
In the end this encounter is about DPS and proper execution. Good luck to all of you that are pushing this encounter…
0 Responses to “Anub’arak in detail”